|
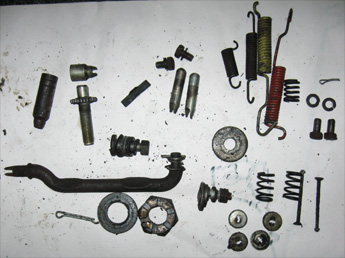
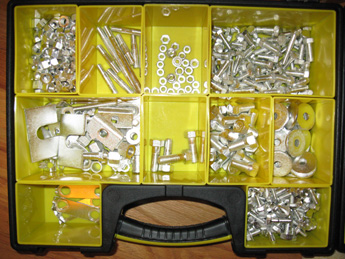
A good restoration always comes down to detail work. For the most part, everyone gets the big stuff done right -- a good paint job, nice engine rebuild, and new tires. So when it comes time to assess quality and hand out the awards, judges look for the detail work. And that includes every part right down to nuts, washers and bolts.
You need to assess the usability and cleanliness of each part before you put it back on your car. And you can’t assume that any given part is fit for further use without cleaning it first! An accumulation of road grime is not only ugly and unpleasant to handle, it can conceal potentially dangerous cracks and thinning.
The Three Offenders
In addition to grime (grease and dirt), you will also need to be concerned with removing rust and old paint. No one solvent or process is best for all three offenders. If you are using solvents only, consider rotating your parts in different solutions. For example, use a parts dip to remove grease and dirt, then a paint remover, and finally a rust remover. Repeat if necessary. Rinse and dry the parts in between solutions so you don’t contaminate one solvent with another or cause unwanted or even dangerous chemical reactions. If you are planning on bead blasting, cleaning the parts with solvent first will speed up the process.
Luckily, your options for cleaning small parts are wide-ranging and much less expensive than the methods used for larger pieces such as the frame and bodywork.
Bead Blasting
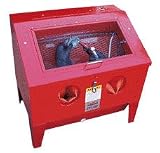
One of the easiest ways to clean small parts is to blast them with an abrasive compound. An abrasive blast cabinet or bead blaster is a metal box in which a compound is propelled toward your parts using air pressure. The cabinet has a glass window so you can see what you are doing and integrated rubber gloves so you can handle the parts without blasting your hands. Cabinets start at under $150 but there are related expenses: You will need an air compressor that can keep up with the demands of the blaster (typically a working pressure of 100 pounds or more.) An inadequate compressor will result in you needing to pause every time the pressure starts to fall. Also, there is the expense of the abrasive compound, gloves, and glass which will need replacing over time.
Bead blasting will remove grime, paint, and rust but start with parts that are as clean as possible or you’ll end up replacing the abrasive compound frequently.
 |
|
Hint... |
|
Using dirty or an inferior abrasive compound can impinge ferrous particles into the surface of stainless steel. The result can be the delayed appearance of rusty brown specs.
|
Solvents
You can start with a bucket and soapy water, or a large can of solvent such as B12 Chemtool or mineral spirits. For a bit more money, you can buy a benchtop or free-standing parts washer that uses either water or solvent-based fluids. Many restorers use gasoline, bio-diesel, or kerosene instead of more expensive solvents in these cleaners.
Trichloroethane (TCE) and Perchloroethane are used in “Brake Cleaner” sprays. These solvents are very effective at dissolving all kinds of grunge, but they’re expensive and you don’t want to have prolonged exposure to these chemicals on your bare skin, or in an unventilated working area. It’s best to avoid them for major cleaning jobs.
If you plan to clean a lot of parts, and you have a sewer connection in your garage or shop, you can usually obtain a working dishwasher at very low cost and install it in your shop. Take out the top rack and you can fit some very large pieces into it and wash them with detergent and steaming hot water. This works very well!
There are some tradeoffs to each of these options, and that’s why many shops have more than one type of cleaning station. Many solvents will dissolve or substantially weaken rubber parts, including the diaphragms in mechanical fuel pumps. Room-temperature water-based cleansers are less effective on grease and oil-based gunk, even with soap or detergent additives. Water can also pose a rust problem on some surfaces.
In general you’ll do well with a small benchtop solvent-based parts washer and a bucket with some Simple Green or Oil Eater detergent and hot tap water. Be sure to buy a set of varied scrubbing brushes for each one, and don’t trade those brushes back and forth! You’ll want a variety of steel wire brushes, a brass wire brush, and some nylon brushes in your water-based bucket.
Mechanical Cleaning Methods
This last category includes manual and motorized cleaning methods. In addition to wire and nylon brushes, you will want to have a couple of scrapers on hand to remove caked grime. A good putty knife works well for surfaces where scratches won’t matter. Otherwise consider a plastic spatula.
Another great cleaning tool is a big pack of common kitchen “Scotch-bright” pads. You can use these and throw them away when they get dirty. They also make good filter elements if your benchtop parts washer has a fluid pump. You can also use kitchen scouring powder with your Scotch-bright pads for very good results.
For longer bolts, you should have a bench grinder outfitted with a fine steel wire wheel or a softer bristle wheel to remove rust and accumulated gunk. If you want to be complete, a buffing wheel is a nice addition. You can polish up many parts to a high shine with some jeweler’s rouge.
For bolt heads, you may also spend some time with your set of dental picks, working the crud out of the stampings on top. The same technique is often used on the nooks and crannies of brackets and castings.
Commercial Cleaners
If your shop doesn’t lend itself to cleaning equipment, or the thought of spending hours scrubbing and picking each and every part doesn’t appeal to you, you can have your small parts professionally cleaned for less than the cost of a benchtop parts washer. The tradeoff with this method is that the cleansing company will not generally be able to keep all your parts strictly organized while they do their work. Plus, you’ll still have to clean up those fuel pumps, brass bits, and other odd parts that can’t go through a hot tank.
Summary
Whichever method you choose, the rewards for being diligent and attentive to detail come back to you immediately and last for the life of your restoration. You’ll uncover the beauty and design of your car’s parts as the yuck comes off, and reassembling your car will be a pleasure. Finally, using clean parts makes future maintenance and repair much easier, and you’ll be confident that your restoration can pass any white glove test the judges may want to give.
|
 |
DO |
- Clean every part, no matter how small
- Use care to select the right cleanser for each part
- Inspect each part for cracks, stripping and thinning as you clean it
- Practice sound environmental cleanup
|
 |
DON’T |
- Don’t put aluminum parts in a caustic “hot tank”
- Don’t put any rubber pieces into a solvent bath
- Don’t use any cleansing method that might destroy a part
- Don’t use open flame or red-hot tools near solvents
- Don’t allow prolonged contact between solvents and your skin
|
|
|
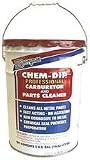
Cleaning small parts can be very time consuming. When I began to reassemble the chassis I put one of the baggies of nuts and bolts in Berryman Chem-Dip. As a rule, Chem-Dip works well for removing grease and gunk, and it will remove many paint coatings, but it can take a day or two.
I also noticed Chem-Dip did not remove rust. So I put the parts in a container with naval jelly rust remover. That removed the rust but it took hours to do its job completely. I quickly realized the whole cleaning process would take at least overnight for each batch of parts.
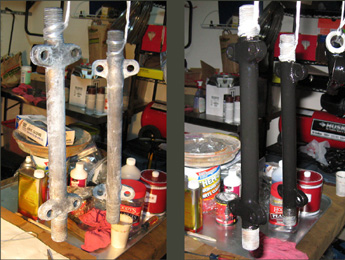
The next question was what to coat the parts with once they were clean. I didn’t like the idea of assembling the car with untreated bolts, and then painting just the heads. That seemed like a surefire way to end up with bolts rusted in place, especially if the end threads are exposed, as with fender bolts. So I considered plating. Home plating kits are an option but I like to do things quickly. I didn’t want to wait for the plating process, a baggie-of-fasteners at a time. After a few phone calls to local platers I settled on clear (silver as opposed to gold) cadmium plating--more on this in our plating article. Eastside plating said their cleaning treatments would remove grease and either rust or paint, I can’t remember which. But it would not remove all three. I ended up photographing each baggie of parts, taking them to American Metal Cleaning, and then to the platers to have them cadmium plated.
Actually, I did the above process twice as I hadn’t yet disassembled the body when I was reassembling the chassis. When I took the parts to American Metal Cleaning, they asked me to bring them in a five-gallon plastic bucket with small drain holes punched in the bottom. And they said no aluminum as it would dissolve.
That took care of small parts cleaning for most of the vehicle but countless times I’d pull some large part out of a storage bin and realize it too needed its fasteners or some sub-component cleaned. What I ended up with a three step dipping process: Berryman’s Chem-Dip to remove grease and gunk, a covered five gallon bucket containing about one gallon of paint stripper, and another covered five gallon bucket (empty) in which I would spray the parts with rust remover or coat them with naval jelly. I allowed an hour or more for each step and sometimes overnight for stubborn parts. After cleaning I usually painted the parts with metal etching primer and then a spray paint top coat.
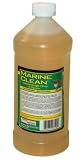
For the parts that I planned on painting with POR-15, I used their prep products. Marine Clean is an alkaline-based degreaser and Metal Ready is an acid-based rust remover that etches metal surfaces and leaves a coat of zinc phosphate to inhibit further rusting and promote better paint adhesion.
One word of caution is to take the warnings on the cleaner containers seriously. I didn’t want to breathe the fumes so had the garage doors open as much as possible and kept covers on the containers. Also, be sure to research the potential fire and explosive dangers associated with each product.
|
|
Mike Walton
9940 N. Vancouver Way
Portland, OR 97217
AmericanMetalCleaning.com
PR: There are lots of small parts that need to be cleaned to complete a restoration. How can a restorer get a bucket of fasteners or small parts cleaned?
MW: We go through a series of chemical dips and pressure washing that gets all the rust, paint, gunk and grease off. We do small steel parts like nuts and bolts and aluminum parts with a different process, and we can also do anything up to a full car body.
PR: Is the chemical dip caustic?
MW: The first step is caustic, and that takes off the paint and grease, and the undercoating. The next step is a detergent solution with an electrical current through it that just rips the rust off.
PR: Many restorers are afraid of chemical stripping because they believe that caustic chemicals may become trapped in nooks and crannies of their parts and leach out later. How do you neutralize the chemicals so that doesn’t happen?
MW: There’s almost no need to neutralize any more. It used to be where people would acid-dip their parts, but no one does that any more. Actually, we are just now exchanging our current chemicals for different ones that are easier to rinse and wash, and they will be less hazardous to the environment, and they will do just as good a job.
PR: When parts come back from chemical stripping, are they ready to paint?
MW: They can be. The last thing we do is wash the parts with hot water, then we force dry them. That leaves nuts and bolts darn near ready to go. We can also iron phosphate body panels or doors. Then they’re literally ready for the primer booth -we don’t even want you to touch them before they get sprayed.
PR: About how much should people expect to spend to get small parts cleaned?
MW: A 5 gallon bucket of nuts and bolts, about ¾ full, runs about $30. Larger parts such as control arms are about $15. We’ve been in the business a long time, so we know what any bunch of parts will run. When you bring stuff in, everything gets itemized and each individual part is priced. You get a signed copy of that, and that’s what you can count on.
|
| Click on any item below for more details at Amazon.com |
|

|
|
Richard Newton
Ultimate Garage Handbook
Motorbooks, Paperback, 2004-11-20 |
|
ASE Master Technician Richard Newton shows you how to set up a garage that is both fantastic-looking and practical. The book covers lighting and flooring upgrades, storage solutions, air compressors, heaters, blasting cabinets, work benches, toolboxes, and more.
|
|
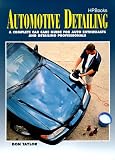
David H Jacobs Jr
Ultimate Auto Detailing Projects
Motorbooks, Paperback, 2003-09 |
|
This book covers detailing in a series of easy projects, such as using a clay bar, cleaning wire or mag wheels, trunk detailing, and so on. The book is divided into chapters based on the area detailed, such as “Under the Hood” or “Tires and Wheels” and includes many photos and detailed instructions for a solid detail job.
|
|
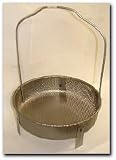
Troy
Troy Bench Top Large Sandblast Cabinet
|
|
Blast rust, scale and dirt away in seconds. Take parts down to bare metal with sand, glass beads, or aluminum oxide. Includes interior flourescent light and dust filter.
|
|
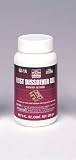
Berryman
Chem-Dip Professional Parts Cleaner
|
|
Five gallon container. Chem Dip is a fast acting immersion cleaner for all metal parts including alloys. It is non-corrosive to metal and requires no agitation. Removes carbon, varnish, paint, sludge, and grease fast.
|
|
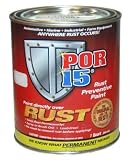
POR-15
POR-15 BLACK SEMI-GLOSS RUST PREVENTIVE PAINT - QUART
|
|
Dries to an incredible rock-hard, non-porous finish that won’t chip, crack, or peel. Prevents rust from recurring by protecting metal from further exposure to moisture. Use it to coat rusty frames, floor pans, farm equipment, marine equipment, or even a heavily corroded battery tray.
Use Marine Clean and Metal Ready cleaners before applying POR-15.
|
|
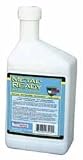
POR-15
MARINE CLEAN - QUART
|
|
It cleans and degreases in one application without leaving residues or noxious fumes. Use it to clean canvas, vinyl, nylon, holding tanks, grease traps, auto parts and more.
Use this cleaner for the first step of the POR-15 preparation procedure.
|
|
|
AutoMedia.com has an intersting article on cleaning your parts with over cleaner.
|
|
|