When your restoration is done, your car generally looks as good as it did when it sat on a showroom floor, and in general the quality of the paint is much higher than it was originally. The trim is generally about at the same level it was when the car was new.
After you spend a moment admiring the beauty of it all, your thoughts inevitably turn to protecting the investment you have made. I believe this is the origin of “Trailer Queen” restorations -the investment is so high that the owner will not risk even ordinary wear and tear on the car by driving it on the street. At the other end of the spectrum, no one in his right mind takes a freshly restored classic and parks it outside to be battered by sun, rain, and temperature. If you’re committed to driving your car, the best answer for the protection and maintenance of your investment lies somewhere between those extremes.
Obviously, storage is a big deal, and there’s an entire article and interview devoted to that topic. But proper maintenance of your bodywork, paint and trim are also big part of protecting your investment. Get this right and combine good maintenance with good storage and your restoration will still look new in a year, three years, or even five years hence.
From the time you take delivery of your restored classic, you need to follow a rigorous maintenance program. And the first few months are absolutely critical in the life of your paint job. Above all else, you need to follow the instructions of your paint professional. Each formulation that is used comes with instructions for care. It takes several months for paint to completely cure and harden. There are still volatiles evaporating out of your finish throughout that time. Therefore, if your painter says not to put a car cover on it, not to wax it, and to wash it with simple products, you must follow those instructions exactly.
Once that curing period is over, use products recommended by professional detailers or your painter. Again, follow all the instructions on your selected products for best results. The way our fathers used to do it and the products they used were the best of their time, but products and techniques are different today and require us to learn new ways.
One variable you can research is your water hardness. Hardness is a measure of the dissolved mineral content in your water. If you have hard water (with lots of minerals) and you let that water evaporate on your paint, the minerals are left behind in the form of water spots. Those minerals crystallize on your paint and are difficult to remove without scratching your finish. A quick test is to boil some water away until the pan is dry. Did the water leave a mineral residue? That’s hardness. In general, if you’re using well water it’s likely to be hard, and if you’re using city water it’s likely to have been softened for you.
But even soft water can leave spots. Your best defense is to have a good supply of high-quality soft terry cloth or microfiber towels handy when you wash and wax your car. Never wash your car in direct, hard summer sunshine. Water will evaporate faster than you can dry the car. Wash your car in a shady place, or even indoors if possible, and dry it off as fast as you can.
So, water spots are one thing, but what about the nightmare scenario? I took my classic on the highway one day--headed to a Concours D’Elegance early in the morning. As I motored along the road, the car in front of me wandered onto the shoulder and tossed back a spray of gravel. I swerved to the next lane but it was too late -the front of my car was peppered with rocks, taking several small chips out of the paint. I was distraught, but at least the judges said they wouldn’t deduct points for the damage under those circumstances. But I was still left with a double-handful of rock chips to repair!
The best bet for paint repair is to take the car back to the original painter. With any luck, you were given a can of spare paint at the time the car was painted. That spare can was the exact mixture used to paint your car, so you know the match should be close to perfect. Take that can back to the painter and have him assess the damage and decide to reshoot or touch up the area. Often, they’ll be able to wet-sand the touch up and bring your paint back to perfect condition.
If money’s a problem or you can’t take your car to a pro, then get in there and touch it up as carefully as you can. Without extensive experience in paint and bodywork, you can’t really mask and reshoot your car at home. Feathering in the new paint, dealing with clearcoat and getting fresh paint to adhere is generally beyond the amateur restorer’s capability in a garage. However, you can usually wet-sand your touch-up to a pretty good finish -but use only 2000 grit dripping wet soapy sandpaper, and sand only the touch-up, not the surrounding paint. Follow the sanding with a clear touch-up, then use a good paint polish to shine up the repair.
For trim, the basic rule is to keep it clean, attack rust before it starts, and at all costs, don’t fuss over it too much. You can do more damage than good if you start worrying about tiny flaws. Take it to a pro if there’s something that really bothers you.
Body, paint, and trim maintenance is easy -just always treat your car with as much care as you did on that first day the restoration was finished.
|
 |
DO |
- Follow your paint professional’s advice about waxing and treatment
- Follow the directions on your quality wash and wax products
- Wash your car in sections and dry it immediately with a quality towel
- Avoid situations where you’re likely to get a rock chip
|
 |
DON’T |
- Don’t cover a damp car
- Don’t wash a car in direct hard hot sunlight
- Don’t use touch-up that didn’t come from the same can used to paint your car
- Don’t fuss too much with your trim
|
|
|
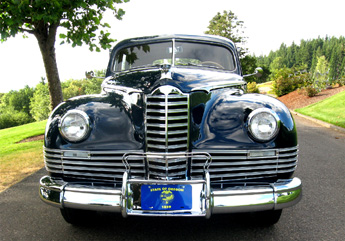
I decided on a two-stage (base coat/clear coat) paint job for the Popular Restorations feature car. This is because minor imperfections in the paint can be corrected easily.
I asked the owner of the body and paint shop what he recommended regarding washing, polishing, waxing and buffing the paint. Later on, our Packard club had a Meguiar’s Car Care Products company representative speak at one of our meetings. I forgot a lot of what he said so I called Meguiar’s and spoke to their customer service. The guy that answered the phone seemed happy to take time to explain their products to me. I don’t remember any conflicting advice so here’s an overview of what I learned from the paint shop, the Packard meeting, and Meguiar’s customer service:
Washing
Never wipe down a dusty or dirty car as it will put small scratches in the paint. Always start by rinsing off as much dust and dirt as possible.
Wash the car using a freshly laundered mitt and a mild shampoo such as Meguiar’s NXT Generation Car Wash which is gentle and does not strip off wax.
Dry the car with a chamois or a microfiber towel. Be careful to keep the towel/chamois free of dirt or it will scratch the finish. Pay particular attention when you dry the lower parts of the car and the wheels where it is more likely you may have overlooked dirt when washing and rinsing. Consider using a dozen or more microfiber towels; this will reduce the likelihood that you will pick up dirt on one panel and create scratches on the next. Launder the microfiber towels or chamois in between car washings but don’t use fabric softeners or antistatic sheets in the dryer as they will reduce absorption.
Note: Here is a suggestion on how to minimize scratches. Put the shampoo and some water in a bucket. Rinse the car then put the mitt on the top of the car and pour some soapy water on it. Wash the top of the car and then rinse the mitt thoroughly with your hose. Now put the mitt on the next panel to be washed. Pour some soapy water on it and wash that panel. The idea is to never return the mitt to the soapy water--this keeps the soapy water free of dirt and sand.
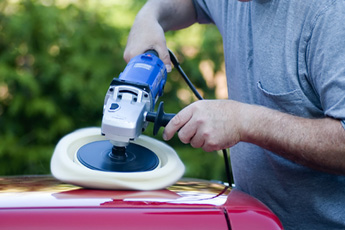
Polishing
Skip ahead to the Detailing page for Part II of this article, Polishing, Waxing, and Buffing.
|
|
|
Greg Wagner
6210 SW Lakeview
Lake Oswego, OR
(503) 740-3463
PR: After the restoration is complete, what maintenance do you recommend for painted bodywork and bright trim?
GW: I like to see cars stored in garages, but I don’t like to put car covers on them, because they’ll hold moisture in. I think you’re better off to take it outside and hose it off with water, wash it, and dry it with a towel. Always use a nice terry or microfiber towel or a chamois to dry it off right away or you’ll get water spots on the paint, and those have to be buffed out.
PR: What about waxes?
GW: I try not to wax them too often. I just use a nice carnauba wax every six months or so. I don’t use paste wax.
PR: How about trim and brightwork?
GW: It’s the same treatment. Just keep it clean and put carnauba wax on it and don’t use paste wax.
PR: What about interior trim?
GW: Once again, just keep it clean. I just like warm mild soapy water and a soft brush. Scrub it gently, and take a towel and dry it off right away. I don’t like to put a lot of Armor-All and other stuff on my interiors. I prefer a natural look -I prefer it to look like it did. Keep it clean and it will stay that way a long time.
PR: What about other products?
GW: They’re fine, but they don’t last very long. Liquid Carnauba wax will last longer. And as far as brightwork, you can use 4-ought steel wool, but you have to be careful not to hit the paint with it.
PR: You mentioned buffing out water spots. What products do you use for that?
GW: I use Meguiar’s products in two stages. I use a fine cut and then a polish and swirl remover. I use a professional variable speed buffer. You use a yellow pad and then a black pad -one pad for one buffing material, and never mix your pads! Plus, you can only use each pad so many times before you have to throw them away and get a new one. It takes the better part of a day to buff out a car so you don’t get the swirls. But everyone’s got a different technique and it’s just whatever that guy likes and what works for him.
|
| Click on any item below for more details at Amazon.com |
|

|
|
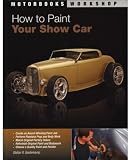
Stefan R. Gesterkamp
How to Paint Your Show Car
Motorbooks, Paperback, 2008-10-21 |
Stefan Gesterkamp leads the reader through the concours painting process including precise color matching for complete paint jobs, and how to match weathered panels when doing area touch up. How to Paint Your Show Car will provide you with a solid and valuable foundation of knowledge, whether you do it yourself or hire a professional.
|
|
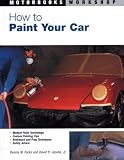
Dennis W. Parks
How to Paint Your Car
Motorbooks, Paperback, 2003-10-12 |
This book is an excellent choice for the restorer who plans to paint his or her own car. The text covers modern paint chemistry, offers air pressure drop tables, and covers often-overlooked areas such as masking and paint gun settings. The bodywork section is light compared to some other books, but offers great details in surface preparation and paint application technique.
|
|
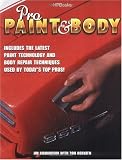
Jim Richardson
Pro Paint & Body
HP Trade, Paperback, 2002-09-03 |
|
This is another well-reviewed guide to professional paint and bodywork. It includes information on bodywork tools, materials and techniques. A partial list of subjects includes: Assessing a project car and damaged bodywork, disassembly and stripping, basic hammer and dolly techniques, diagnosing dents, fillers, leading, spray guns, current paint technology, color coats, color sanding, and custom colors.
|
|
Pat Ganahl
How to Paint Your Car on a Budget
S-A Design, Paperback, 2006-06-30 |
This is a great basic paint book. If you just want to throw a nice coat of paint on a car, this book will tell you how to do it. If you are going for the complete 100-point absolutely perfect show car paint job, this is not your book. Basics of bodywork are covered, as is paint prep and the sanding/cutting/blocking process. Paint jobs at several different levels of commitment are detailed in step-by-step procedures.
|
|
Jeff Lilly
How to Restore Metal Auto Trim
Motorbooks, Paperback, 1997-07-12 |
|
This is the book to have if you do a lot of trim work. Sections cover safely removing trim, marking flaws, repairing flaws, sanding and buffing, and unusual trim pieces made of copper, brass, aluminum, and so on. The book is photo-rich and includes detailed instructions on repair and restoration.
|
|
John Gunnell
How to Restore Automotive Trim and Hardware
Motorbooks, Paperback, 2009-07-15 |
|
When it comes to restoring classic cars, the devil is often in the details--specifically, the small pieces of decorative trim and hardware. In this book one of the best auto restorers around provides step-by-step instructions for getting those essential details just right.
|

|
Empire Covers
3 Layer Car Cover: Fits Cars Less Than 157"
|
|
All Weather Protection At A Budget Price! 3 Year Warranty: FREE replacement at any point during this warranty period if the cover deteriorates from normal use in sun, rain, snow and dust. This warranty is on all materials, including stiching, elastic hem, grommets, and cover fabric. You don’t even have to pay shipping!
Breathable and gentle on paint. Full elastic hem for a secure, semi custom fit. Includes built in grommets, warranty, storage bag and antenna patch.
|
|
|
CarCoversDirect.com and CalCarCover.com both have a wide selection of custom car covers for classic cars.
Meguiar’s Video Center has detailing videos including,
- How to Clean an Protect Your Vinyl, Plastic and Rubber Surfaces
- How to Remove Swirls and Scratches
- How to Maintain Your Finish
|
|
|