|
The first step in a restoration that involves a wrench is the disassembly of the project car. For too many cars, this is also the last step--you can check that by the number of “basket case-started restoration and lost interest” cars for sale. Disassembling your project car is likely to be the easiest part of your project, but it’s absolutely critical that you do this job right, because you will eventually want to put your car back together correctly.
The amount of disassembly you’re going to do depends on your overall restoration strategy and restoration objectives. If you’re going to to a complete frame-off restoration, then complete disassembly will be necessary. To freshen an existing restoration or just to fix up an older car, you won’t need to take everything apart, and you can choose how far down to take your car. For the balance of this article, we’ll assume you’re taking the car all the way apart - to the last nut and bolt.
Get Yourself The Right Stuff
Here’s a list of tools you are absolutely sure to need -you may find you need others, but these are the bare minimum:
- A set of sturdy high-quality jack stands suitable for supporting your car
- A good camera with a flash
- A notebook with plenty of pages and a supply of pens, including sharpies or mark-alls
- Safety goggles -get several sets and place them around your shop so there’s a set close to hand when you remember that you need them.
- A set of quality combination wrenches in the correct format (SAE/Metric/Whitworth) for your car. Gear or racheting wrenches are always nice to use. Include several copies of the most commonly-used sizes (e.g. 7/16”, 10mm)
- A set of quality sockets and socket wrenches. Get a set of impact sockets and an air or electric impact wrench if at all possible.
- A set of quality screwdrivers in flat and philips heads
- A variety of pliers from needle nose to large plumber’s slip-jaw
- A variety of drip pans, catch pans, and large sheets of cardboard
- A large supply of clean shop rags
- Two dead-blow hammers in rubber and brass or lead, and a good 3 or 4 pound steel sledge hammer
- A set of cold chisels
- A handheld propane bottle with burner nozzle
- A set of wire brushes
- A new, tight, hacksaw with several blades
- A good replaceable blade box cutter
- A good supply of WD-40, Knock’er loose, or other penetrating oil
- Any specialized tools (such as allen-head or Torx wrenches) your vehicle needs
Other tools may come in handy, such as a small voice recorder, engine hoists, nut-breakers, tap and die kits, bolt extractors, parts washers, dremel grinders, spring compressors, steering wheel pullers, ball joint separators, and so on. Many of the more exotic of these tools can be rented, while others will have to be purchased or fabricated.
Second only to having the right tools is having the right space in which to work. Your work space will be your home for many hours over many months, so it should be warm enough in winter, and hopefully not an oven in the summer. Your work space should have a good floor, because your car will spend a lot of time on jack stands or otherwise off its wheels, and it should be weatherproof.
Good lighting is essential, and easy access to electricity will also make your work more convenient. If your workspace is not well-lit, consider investing in lights. You’ll be glad you did when you’re looking for the parts and wrenches you’re going to drop.
Finally, your workspace should be large enough to accommodate you, the car, several of your friends, the spare and replacement parts you’re going to be receiving, all the parts you remove from the project car, your tools, and anything else you might have in the shop, such as a stereo or refrigerator.
Documenting Your Process
You may hope to get your restoration done in time to drive your car to an event this year, but the fact is that there are far more projects that take 10 years than get finished in a few months. Realizing that it may be a year or more before you reassemble your project, it’s smart to document and segregate your parts as you take your car apart.
Not only will this record help you reassemble the car correctly, it provides a valuable and enjoyable record of the restoration process, helps you demonstrate the car’s provenance, and creates a record that others may find helpful in the future.
At each step, take detailed photographs of the way each part is assembled. This is especially important if you know or believe that your car has not been changed from the way the factory assembled it. Digital cameras are inexpensive and the images can be downloaded each day and the camera reused. Take more pictures than you think you need. This is an excellent job for an assistant who is not handy with a wrench.
Also, make notes on a voice recorder or on paper as you go. This takes some discipline, but it pays off down the road. Especially note anything that is troublesome, important for function, or counter-intuitive.
Who knows -with a good enough set of pictures and notes, you could write the definitive book on restoration for your chosen make and model!
The Actual Disassembly
When you’ve got everything ready to begin, bring your project car into the workspace and get it situated with plenty of room around the doors (so you can open them during the process) and with good access to the engine bay and the trunk. If you’re going to use a ceiling-mounted hoist to remove the engine, make sure the car is located suitably. Jack the car up and get the jack stands under it so that it is absolutely stable, level, and supported.
 |
|
Hint... |
|
Jack stands are an absolutely critical safety item. People are killed every year when cars fall on them because they weren’t using proper supports. Don’t be that unhappy person.
|
Follow these steps:
- Use a sharpie to mark the position of the engine bay hood on its hinges, then remove the hood and set it aside.
- Now is the time to begin sorting and segregating the parts coming off the car. You can use ziplock freezer bags (these have an absorbent label area for marking contents) for hardware and tape them to larger components. For example, place the nuts, washers, and bolts from the hood in a bag, label it, and tape it to the hood. You may also choose to use small plastic bins, jelly jars, cardboard boxes, or anything that serves the purpose.
- Drain all the fluids from every part of the car. That includes gas, oil, brake hydraulic fluid, coolant, clutch hydraulic fluid, transmission fluid, and rear axle oil. Depending on your year and model, this may also include the air filter! Remove the battery or batteries at this point, too.
- Carefully remove the fuel tank and carefully set it aside.
|
|
Hint... |
|
After you drain the gasoline, re-cap the fuel tank -it’s still full of flammable/explosive vapors. Don’t get it hot for any reason, don’t smoke near it, and watch out for sparks. The same goes for older batteries, which are vented and may emit hydrogen. It’s best if you can take the gas tank and flush it out with hose water -assuming you’ll be de-rusting and sealing it again anyway.
|
- Remove all the trim, bumpers, attachments, and brightwork. No sense denting these pieces if you can avoid it. If your car has vintage license plates, take care of these -they can be restored like everything else. You can also remove separable fenders at this time to avoid dents and give yourself more room to work.
- I like to remove the engine and drivetrain as soon as possible. These are often the most dirty, greasy parts, and you’ll want to get those out of the way. Chances are that you’ll need to remove ancillary items such the radiator at the same time.
- Next, remove the wheels, brakes, axles, steering gear, exhaust and suspension. Be careful when dealing with springs, especially coil springs. Mark each brake or suspension/steering assembly with the side of the car from which it came.
|
|
Hint... |
|
The undercarriage and suspension is where you’re most likely to find rusted and difficult nuts and bolts. Use patience, heat, and plenty of penetrating oil to work these loose. In extreme cases, you may need to use a nut splitter or other destructive techniques. Be careful not to damage anything that is difficult to replace!
|
- Remove any remaining mechanical ancillary components now. This includes all items such as the clutch and brake master cylinders, windshield wiper assemblies, steering boxes or racks, shift linkages, and so on.
- Mark the positions of the doors on their hinges and then remove the doors. Be careful as these are generally heavier than they look. Carefully note and organize any shims or other positioning aids with the hinges. Separate the hinges from the doors at this time. Mark and remove the trunk lid as well. If there’s a convertible top, mark and remove that, too.
- Next, remove the interior, starting with the seats. You can then get inside the car to work on items like the headliner, trim pieces, panels, carpeting, and the dash. Be careful with the headliner -they’re expensive and sometimes hard to find.
- Disassembling the dashboard is a special case because of the great number of wires. Most total restorations will make use of a new reproduction wiring harness, but take lots of pictures and label each wire, if possible. Masking tape works well for labels. Take great care when removing gauges, they’re delicate. Also, steering wheels can be difficult to remove, and renting a puller is a bargain compared to bending or breaking a vintage wheel.
- Finally, remove the glass. I leave this for last because of the very real chance of breaking a pane or two during the process. This is especially true for later-model cars with “glue-in” windshields. If you shatter some glass, it’s best if you don’t have to find every loose piece by embedding it in your hands as you work on the interior. Plan to replace rubber window gaskets and cut them out with your razor knife for easy removal. It’s not a bargain to break a window trying to save an old gasket.
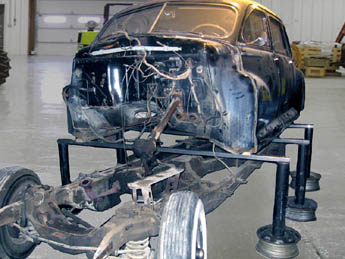
Frames and Monocoque/Unibodies
If you have a body-on-frame car, you’ll need to decide whether to remove it now. Body bolts are likely to have been in place since the car was on the assembly line, and they’re likely to be frozen. Mark the position of the body on the frame before you go to work, because aligning it again can be challenging. Once free, you can lift the fenders and central body parts off. Sawhorses are popular to support these pieces off the ground.
If you have a monocoque or unibody car, then obviously separating the chassis doesn’t apply. But some cars (such as Camaros and Firebirds) have a compromise design with front and rear frame sections that attach to a central unibody. These are attached with large bolts and rubber bushings that are usually rotten and in desperate need of restoration.
An Explosion In An Auto Parts Store
Congratulations! If you’ve followed these steps, you now have a completely disassembled car, with plenty of photos and notes about what you took off and how it went together. You’ve got all the parts neatly organized, and you probably have a pretty good idea of which parts need to be replaced or refurbished before you put the car back together.
If you’ve never done this before, it’s also likely that this part of the project took considerably longer than you expected, and you’re wondering what you’ve gotten yourself into. But don’t despair, because you’re about to start rewarding yourself by collecting cleaned and restored or new parts, and very soon your car will be back on the road to being back on the road.
|
 |
DO |
- Invest in the best tools you can afford. Cheap tools are more likely to slip, and you might ruin a bolt head or injure yourself.
- Be patient. Don’t reach for the hammer or hacksaw until you’ve worked on a bolt for several sessions.
- Be organized. Tossing all your fasteners into a bucket will have you searching for hours to find the last of 4 matching bolts when you’re trying to reassemble the car.
- Take good notes and lots of pictures to help you put everything back when you’re ready.
|
 |
DON’T |
- Don’t work when you’re tired, rushed, or angry. You’re more likely to get careless and ruin something important.
- Don’t say to yourself “I don’t need to make a note, I’ll remember this.” You might, but that’s not a good bet.
- Don’t work under a car without proper support, even if you’ve got an assistant with you.
- Don’t forget to organize and label your parts as they come off the car.
|
|
|
Disassembling the Popular Restorations feature car was one of the most straight-forward tasks of the entire restoration. I placed all of the small parts in baggies with labels and later photographed them before sending them off for plating.
In addition, I took more than 200 pictures during the disassembly. Also of help was that two people in my car club have 1947 Packards and I was able to examine their engine compartments at assembly time. That’s where I learned my biggest lesson: At disassembly time, take many more pictures than you think you’ll ever need. After photographing one of my clubmate’s cars, I had to ask to come back for more pictures, twice! I found I needed high and low shots from all sides of the engine and surrounding sheet metal. Just taking pictures from the top, pointing down, was not enough.
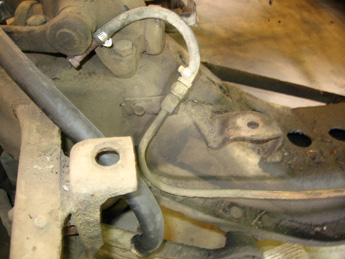
I thought I had done a good job taking pictures of the gas and brake lines so I’d remember every bend and hold down point, but that was another area where I later found myself scratching my head for a while before realizing just how to shape them.
A suggestion I might make to any first-time restorers is to figure out how you are going to treat your fasteners (nuts, bolts, screws, clips, etc.) before you start the disassembly. As I have mentioned elsewhere on this website, when it comes to reassembly, you’ll want clean fasteners that will resist future rusting. Replacing everything is not always an option so you’ll undoubtedly need another plan. I tried placing a baggie-full at a time in overnight baths of carburetor cleaner, paint stripper, and rust remover. That worked but it was too time consuming and it left me with nuts and bolts with no plating and no paint.
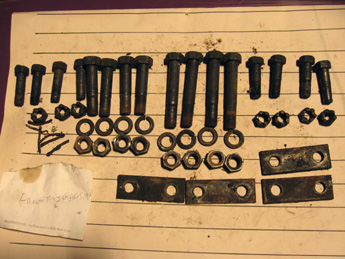
I ended up taking pictures of each bag on a background of paper with one-inch rules. Then I dumped all of the parts in a bucket and took them to American Metal Cleaning, and then to Eastside Plating to have them cadmium plated.
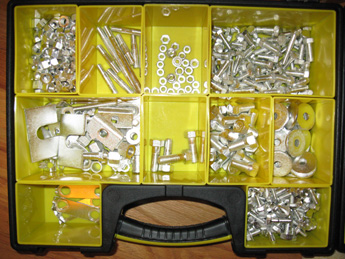
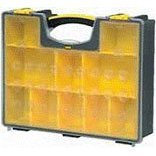
Dumping all of your parts in a bucket doesn’t sound so bad until it comes time to retrieve them. You don’t want to have to look through thousands of fasteners every time you need a particular part. To help sort things out I bought four Stanley Organizers, pictured above, which greatly simplified the retrieval process.
The most significant disassembly challenge was rusted bolts. Some of the front fender bolts were rusted and would just spin when trying to remove the nuts from inside the kick panel areas. I bought an air chisel and went to work on these and a few of the bolts that held the body to the frame. It took some chiseling to get them all apart, with a lot of that time spent at the grinder sharpening the chisel blade. I also had to spend hours drilling out the rusted studs that held the chrome trim on the hood. But in the big picture, dealing with rusted fasteners was a small problem, probably less than eight hours, and certainly less than one percent of the entire restoration.
|
|
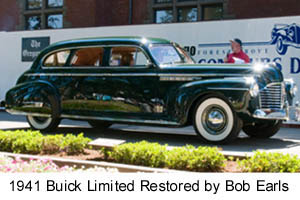
Bob Earls
Webfoot Restorations
Portland, OR
PR: How do you approach the disassembly process?
BE: The first thing I do is take lots of photographs and take copious notes. With a digital camera, just photograph everything, under the wheel wells if you have it on a rack, up under the dash, the underside, and the engine compartment from all different angles. A lot of times, you cannot rely on a shop manual to show you how a wire or a cable is run. Especially if you’re working on an original car, it saves tons and tons of time to be able to see how something is oriented.
PR: Is there a particular order you go through?
BE: In a complete restoration, I tend to get the engine out of the way first. If I can, depending on the type of car, I’ll remove the front clip first. You want to start with the things that are going to be gone the longest, to have work done on them. So you get the engine out and get that going, and leave it as a rolling chassis.
PR: Do you always remove the body?
BE: I’m not real big on body-off, so the only time I’ll do body-off is if it’s going to be a real show car. It’s a ton of work. Not so much taking it apart as putting it back together and getting everything torqued properly so that all the doors line up and everything closes properly is easier said than done sometimes, especially with a convertible.
PR: But you need to take the body off if a car is going to be dipped, right?
BE: You’ve got to strip everything down if it’s going to be dipped. Up in the roof and in the doors, there’s an old-fashioned insulation. You need to remove as much of that and undercoating as possible before dipping. The dippers can remove it, but it’s time and materials. The best way I’ve found to remove it is with a propane torch. You don’t have to get it very hot, you just have to get it soft. Then go in there with a wide and flexible putty knife and it just falls off.
PR: How about taking apart interiors?
BE: I let the upholstery shop take car of the seats. Sometimes if there’s rust, I’ll take the seat frames and have them dipped or sandblasted. It’s nice to take those to the powder painter.
PR: What about getting the glass out?
BE: That’s one of my least-favorite areas. Each car is slightly different, and when you start a project, you need to get the factory manual, and in the case of GM cars, you need the Fisher body manual as well. They tell you how to take the glass out, and that’s always a plus. Otherwise, it’s just working on your experience, or gaining experience. For the later-model glue-in windshields, there’s a special tool for it or you can use some fine piano wire and saw it through the glue. But there’s still no guarantee you can get them out without breaking.
For the ones that are held in with a gasket, my advice is that you have your new windshield gaskets in hand before you start. If the rubber is not supple, there’s not way to get the window out without either breaking the glass or cutting the rubber. Work from the inside, because the trim is generally attached to the outside and locked in.
PR: How about taking apart suspension and brake systems?
BE: I have a couple different kinds of spring compressors. Many places won’t rent them because of liability, and this is one of those areas that has the potential for danger. One thing you can do to ease things is to remove the suspension’s upper bump stops. It can give you an extra couple of inches of travel, allowing the suspension to drop down and relieve pressure. I try to remove the upper and lower arms, together with the upright hub, as a unit. It keeps everything together. I try to remove things as assemblies whenever possible.
PR: How about trim and bumpers and bodywork?
BE: The big pain is removing trim. That’s where the manuals are a big assistance. Buick, for example, used an unusual trim clip on some of their cars in the late 30s and early 40s. You’ll ruin some trim if you don’t know how to take it off correctly. A lot of these fasteners are just not available any more. Then you have to use your imagination.
PR: How do you deal with rusted and frozen fasteners?
BE: The problem is that half the time you’re going to break off the bolts that go into the body. Or you’ll twist loose a blind welded nut or a cage nut, and there’s no way you can get to that without cutting or by removing the body completely. Or the bolt will be there, but not holding anything. If you pull the body off, you’re going to break some bolts, and you’ve got to do the whole enchilada.
But sometimes it’s best thing to do, because if you get one bolt out and you find that rust has eaten away the diameter of the bolt, it’s not safe. One good hit and the whole body will come flying off.
PR: Is there anything else to cover about disassembly?
BE: Yes. You really need to join a club. You’re not the first person to run into any problem, and that’s what clubs are good for. We’ve got clubs in Portland to cover just about everything. GM has a specific engineering philosophy, and Ford had a different philosophy. If you go to Mercedes, they’ve really got a specific engineering philosophy. Once you get a basic handle on how these people think, you start understanding the car better. Yes, they’re all a variation on a theme, but each automaker has a way of assembling things, and the way they make things is very specific to the brand.
|
| Click on any item below for more details at Amazon.com |
|

|
|
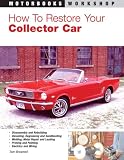
Tom Brownell
How to Restore Your Collector Car
Motorbooks, Paperback, 1999-12-24 |
|
This book has a great deal of information on selecting a potential project car and setting up the workshop, plus a lot of detail on cleaning, stripping, blasting, derusting, bodywork and trim restoration, but comparatively less (just 1 chapter) on engine and mechanical restoration and 1 chapter on brakes. The book includes many nice color photos, however, and would be a good addition to a restoration library.
|
|
Greg Donahue
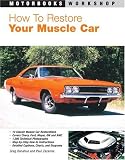
How to Restore Your Muscle Car
Motorbooks, Paperback, 2005-11-07 |
|
This book covers all aspects of restoration in detail, with a focus on the special issues found in 1960s and 70s muscle cars. From car selection through engine and interior restoration, this book is full of photos, illustrations, and step by step procedures. Examples are given from all domestic automakers. Reviews have been generally positive, for example (from AutoWeek): “With clean vintage muscle cars skyrocketing in price, this second edition has good timing, providing updates on parts sources and restoration techniques. We didn’t use the book to restore a muscle car, but we found it clear and concise, with user-friendly disassembly diagrams and 1,300-plus step-by-step photos, from choosing tools and which muscle car to restore, to completing the restoration.”
|
|
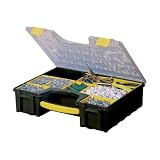
Stanley
Stanley Storage 8-Compartment Deep Professional Organizer
|
|
(Eight compartments) Stanley organizers are a great way to organize your parts, before and after cleaning and painting or platng. The cup compartments are removable and multiple organizers can be stacked for space efficiency. After your restoration is complete they can be used for organizing spare parts or even household supplies.
|
|
Stanley
10 Compartment Professional Organizer
|
|
(10 compartments) Stanley organizers are a great way to organize your parts, before and after cleaning and painting or platng. The cup compartments are removable and multiple organizers can be stacked for space efficiency. After your restoration is complete they can be used for organizing spare parts or even household supplies.
|
|
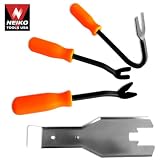
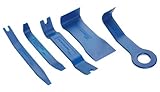
Actron
Actron CP5011 Panel, Trim and Molding Removal Set
|
|
Includes five tools for easy removal of fastener, molding, wheel hubs and more. For use on internal and external vehicle molding and trim fasteners. Plastic construction of tools prevents scratching and damage to vehicle paint, leather, chrome and other surfaces.
|
|
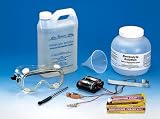
Eastwood Electroplating System - Tin Zinc Plating Kit
|
|
Plate almost any metal part at home including brass, copper, and steel (not for aluminum, pot metal or stainless steel). The Tin-Zinc Electroplating System brings a brilliant luster to properly prepared metal parts with a corrosion-resistant, protective plating resembling chrome but without the expense, hassles or hazards.
|
|
|
MadElectrical.com has a good treatment on removing frozen/broken bolts and studs.
AutoTwirler.com is a good place to start when looking for automotive rotisseries.
Restoration-Manager.com has software that helps you catalogue parts as they are removed from the vehicle and gives you the opportunity to make notes and take photographs that will help when you reassemble the vehicle.
|
|
|