|
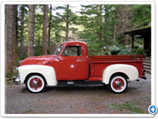
This is Part 4 of a four-part interview with Custom Automotive Restoration in Portland, Oregon. Be sure to also watch:
Part 1: Introduction
Part 2: Classic Car Repair
Part 3: Selecting a Restoration Candidate
Video dialog for this episode:
PR: When it comes to preparing a car for show, attention to detail is extremely important. How important? Let’s talk to Don about something as simple as a bumper.
PR: Thanks for joining us again, Don. What do you have to show us today?
CAR: This bumper is for a 1967 Chevelle. The owner wanted this bumper extremely straight and very smooth.
PR: That sounds like a pretty straightforward request. So what do you have to do to fulfill that request?
CAR: First the bumper is sent to Oregon Plating, where the chrome is stripped and the copper is stripped, down to the bare steel. The bumper comes back to us and we straighten it out. We hammer it, file it, and pick it, and get it as straight as possible. It’s then returned to Oregon Plating to be copper coated. It comes back to us and we hand sand it, the same way you would hand sand a paint job to remove the high spots and low spots. It’s labor intensive and takes a lot of time.
PR: That sounds like it’s not a cheap process.
CAR: Each time this bumper is sent to the plating shop and coated with copper, it’s at least $200.00. This one has been back and forth nearly six times.
PR: Is that typical for a show car bumper?
CAR: Most bumpers on most cars that you see at a car show have been sent to the plating shop, stripped, coated, polished, and look beautiful. But some people want their bumper to look just like their paint job, smooth with a reflection just like a mirror, and this is what it takes: many, many hours of sanding.
PR: So what’s the role of copper in the process? What other metals are involved?
CAR: Chrome plating is a three-step process: Over the bare steel is copper, then nickel, then chrome. I can’t tell you the chemical reasons the copper has to be put on, but the copper must be done. To give it a mirror finish, it has to be hand sanded and hand sanding copper is much more difficult than hand sanding paint.
PR: I can’t imagine this is how these bumpers were built originally. Were they?
CAR: Originally, this wouldn’t have been done. The bumper would have just been stamped, from very smooth, very nice molds, and then chrome plated.
PR: In the pursuit of perfection, the level of detail has really escalated, hasn’t it?
CAR: It’s ridiculous. The bumper looks much better than it ever did, then it ever had any reason to. But if this is what somebody wants, this is what we’ll do.
PR: Now that you have this incredibly smooth bumper, how do you attach it to the car without messing up the finish?
CAR: If you just look at the face of this bumper, there are no holes for the bolts. They’ve been filled. The bolts have been welded to the backside. And if somebody wants to do that to your bumper, don’t just weld the bolts on the backside because you’ll see it on the front. You’ll need to install a large reinforcing plate.
PR: Why does the reinforcement plate make a difference?
CAR: The reinforcing plate is first welded to the bolt, so you have a plate with a stud. Then the plate is welded to the bumper and it has to be done correctly or else you’ll have a large ring on the front. It’s easy to weld something incorrectly.
PR: So any final tips for folks who may be mounting their own bumpers?
CAR: When mounting a bumper on your car, don’t over tighten the nuts. If you over tighten the nuts and bolts, you will bend the bumper. It will no longer be a straight, shiny bumper. Everyone does it. It’s easy to do. So don’t over tighten your bumper bolts.
|